Building a Draft Beer System Part 1

Gas (CO2) Side

The gas side of a draught system is used primarily to push the beer out of the keg with carbon dioxide. CO2 (carbon dioxide) protects the beer from off-flavors created when oxygen interacts with flavor and aroma compounds in the beer. If you’ve ever had beer from a hand-pumped keg, then tried to drink from the same keg the next day, you’ve noticed how the flavor of the beer changes for the worse.

By using a CO2 tank (affiliate link) to provide pressure, you prevent air and oxygen from getting in contact with the beer, preserving the beer’s deliciousness. And also, you don’t have to use a hand pump to pour beer.

Homebrewers Need Extra

If you are just pouring beer, the gas side of your draught system just needs to push the beer out of the keg to your glass. Most people can just have one primary regulator (affiliate link) set to serving pressure, then add a manifold (affiliate link) to split the gas line to as many kegs as you have. If you know you need more than one serving pressure, you can see the notes further down for homebrewers, as your needs are more similar to our needs.

Primary Regulator is in the middle, with a hose leading to a manifold to allow two outputs, one of which is attached to a secondary regulator.

Homebrewers also use their draught system to carbonate their beer in the keg.

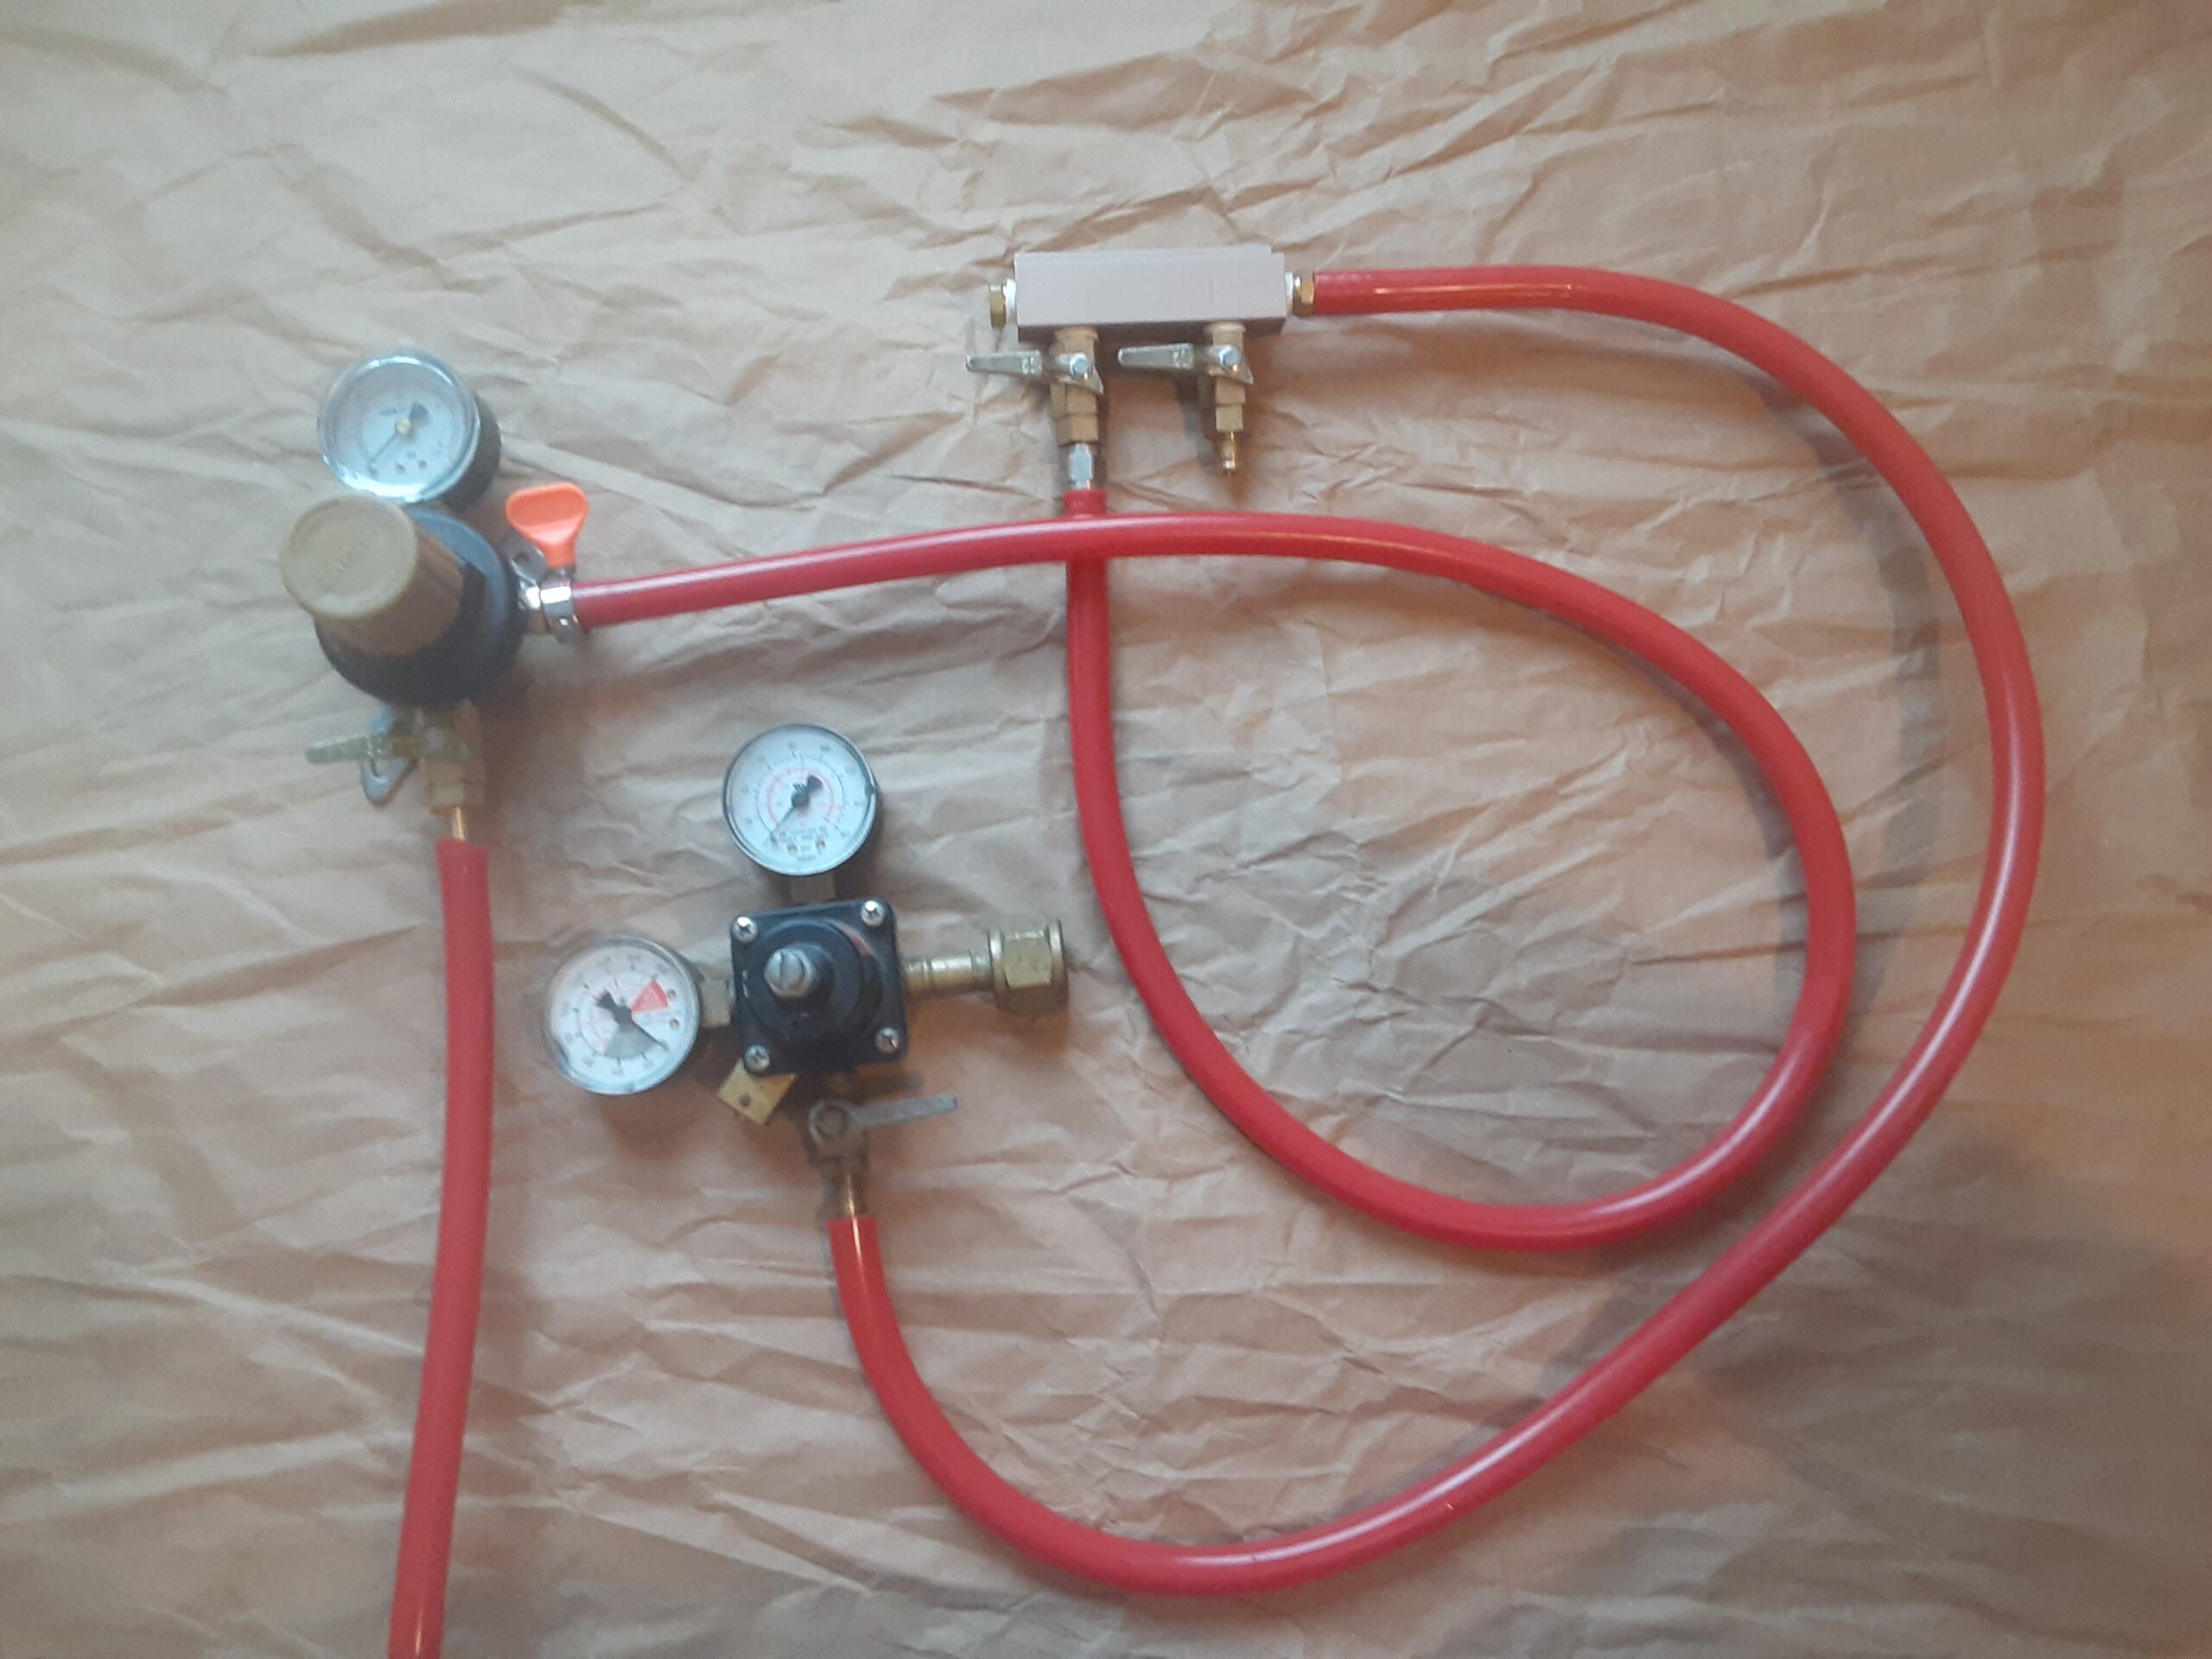
The main difference is that if you are serving commercial beers, you can generally serve more than one beer at the same pressure. But to speed the carbonation process, it is nice to have a secondary regulator (affiliate link) you can leave at serving pressure and have the primary regulator set higher to carbonate the keg more quickly.

Hidden from View

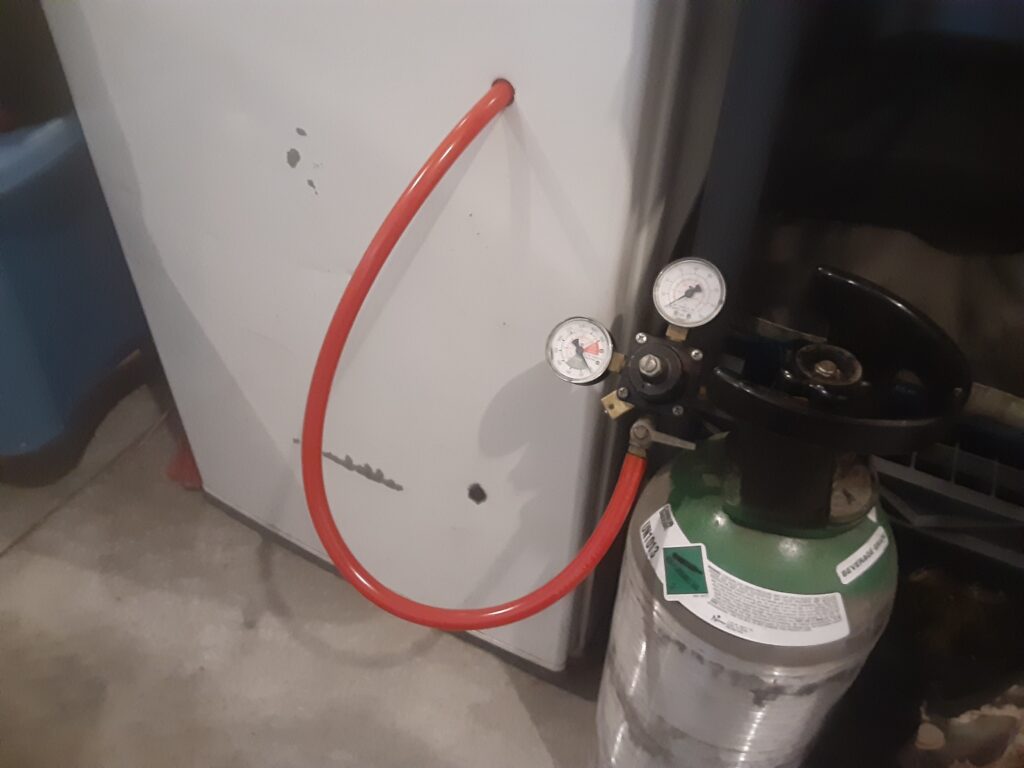
Unlike the liquid side, which has the faucet and tap handle readily visible, many people try to keep the gas side of their draft system out of view. If their converted chest freezer or refrigerator is large enough, some people choose to keep their CO2 tank (affiliate link) in their kegerator next to the kegs. Others add a hole to run the gas line from the tank through the wall or door of their kegerator to free up space for more kegs, as I did in the photo below.

Quick Disconnects

The connection between the gas system and your kegs depends on the type of kegs you use. Homebrewers choose between ball lock kegs or pin lock kegs. In the photo below, you can see I use MFL connections on my hoses so I can switch between ball lock and pin lock kegs.

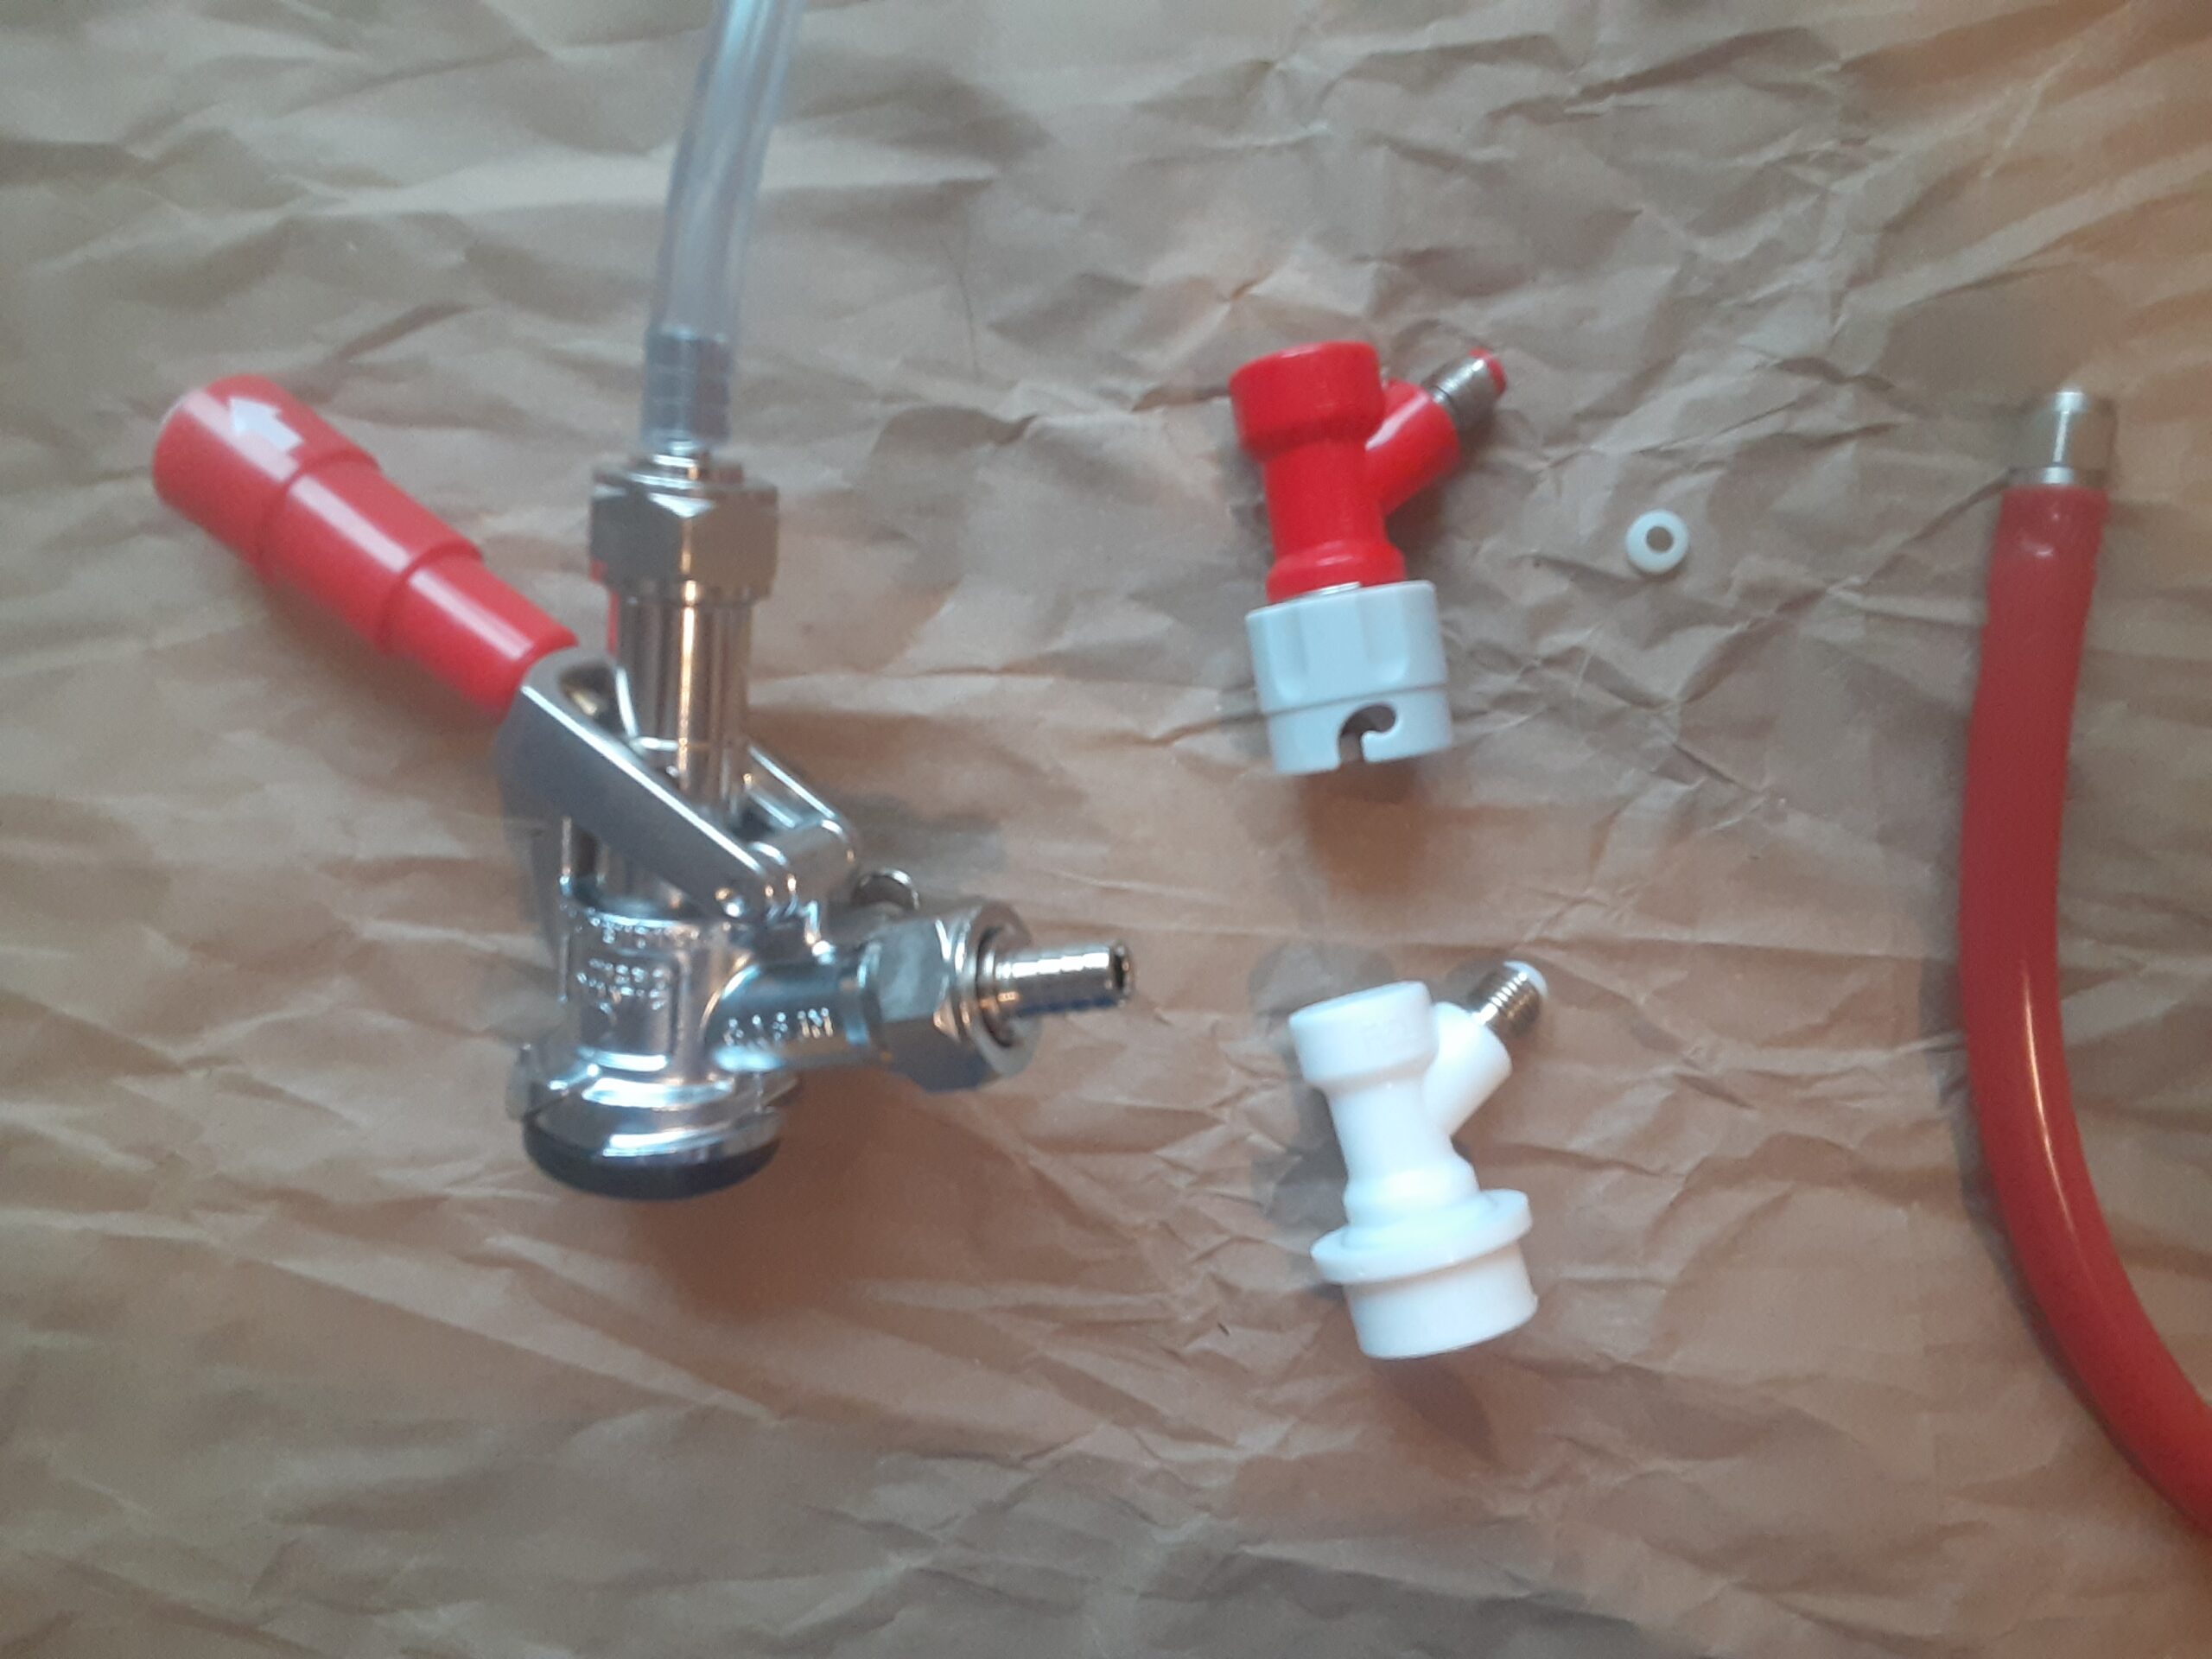
Ball lock kegs and ball lock quick disconnects were used by Pepsi for distributing full kegs of their sodas to restaurants before the current use of concentrates. In a similar way, pin lock kegs and pin lock quick disconnects (affiliate link) were used by Coca Cola. They used different connectors to prevent their customers from switching to their competitors products without needing to replace their whole serving system.

Sanke couplers (affiliate link) are used by commercial breweries, and actually combine both gas and liquid into one connector rather than the two needed for Cornelius-style kegs used primarily by homebrewers.

Tying it All Together

Throughout this article, I’ve shown you all of the separate components that connect to kegs, tanks, and each other. But connecting all of them, you’ll need 5/16″ gas line (affiliate link).

These are the components you’ll need for a CO2 system to set up a kegerator tap system to pour draft beer. If you have questions, please post them below.

#BrewUpAnAdventure

“Double Your Batch,” They Said . . .

“It’ll Be Fun,” They Said

OK, that isn’t really what “they” said. When I was starting to get in to homebrewing, there was a lot of discussion about making larger batches to save time. After all, a ten-gallon brew day doesn’t take twice as long as a five-gallon batch.

This was a common conversation on podcasts and among homebrewers. For most of my friends and I, a five gallon brew day takes about 4.5 hours, including cleanup. Bumping that to a ten gallon batch added a little more than an hour, so I purchased a larger cooler mash tun and some 15 gallon plastic fermenters so I could start brewing ten gallons at a time.

And it worked out great. I slightly extended my brew day and had twice as much beer! I was so excited, I loved it.

And then . . . Bottling Day

If you’re an experienced brewer, you probably know the disaster that awaited me on bottling day. I didn’t think about the fact that twice as much beer in the fermenter means twice as much beer to bottle when it’s done.

And since I had purchased large fermenters, I couldn’t just stop bottling in the middle of the batch. Air was drawn into the fermenters when I siphoned beer into the bottling bucket, and I knew that if I let it sit, oxidation would be an issue.

So, once I started bottling, I had to do twice as much and it took twice as long. And it made the task feel even longer than that.

What did I Learn?

When you are looking for ways to gain efficiency in your time while brewing, think about your entire process and also why you are choosing to make beer at home.

If you are brewing for the fun of it, just let the good times roll and try things. But if you are like me when I did this experiment, you are splitting time between your hobby and family. You don’t need to “go big” without considering all the implications to your process.

It’s OK to make small batches, if that’s what you have the space and time to brew. It’s OK to make bigger batches, if you have the space and time to do that. But don’t get too focused on one part of your process, and end up committing to something you didn’t fully understand when you made one seemingly innocuous decision.

Whatever you decide, you’ll still have beer at the end of it. And that’s one reason this hobby is so awesome.

Brew Up An Adventure!

#BrewUpAnAdventure

The Brewing Book I learned the Most From

Once you decide you are all-in to the hobby of homebrewing, most people start looking for books to learn from. I’m no different, and purchased several books in my first year of brewing.

Many of those titles were focused on refining the process, focusing on little details that made the beer slightly more or less fermentable; created a slightly more efficient brewing schedule; or helped you manage your fermentation process.

Brewing Classic Styles (affiliate)

And I learned a lot from those books, but the book that gave me the information I found the most interesting and useful was Brewing Classic Styles (affiliate link). The beginning of the book gives an overview of the brewing process, and some discussion of equipment.

But Brewing Classic Styles is, first and foremost, a recipe book. It contains 80 recipes for each of the styles in the Beer Judge Certification Program (BJCP) guidelines at the time the book was written. Not just any recipe, either, but recipes that won awards at BJCP-sanctioned competitions.

Why it Mattered to Me

Once I developed an understanding of the basic process of brewing, I didn’t want to obsess about technique and equipment. I had good enough technique and good enough equipment I was making good beer. I wanted to obsess about the recipes and ingredients.

I’ve loved food and cooking as long as I can remember. I can’t remember starting to cook, it’s just always been part of my life. My mom talks about how she used to put my car seat on the kitchen counter, and have me crack eggs into a bowl before I could even walk.

From there, I grew up reading recipe books and watching cooking shows on PBS. Even now, when I walk into a library or book store, I gravitate to the cookbook section.

What I Learned

Brewing Classic Styles taught me many things, but looking at the differences in ingredients for different styles showed me the similarities and minute differences between beer styles.

I still find myself going back to this book and just re-reading the recipes to try to embed them in my brain.

But the most important thing this book gave me is a solid reference for recipe foundations. E.g., when I want to make a beer that falls in a certain color/abv range, I can look at these recipes and get a rough idea for base grain quantities. Then I can improvise the specialty grains and adjuncts to focus on the flavor profile(s) I want.

Beer with Coconut
Hand-toasted coconut in a delicious porter.

This book gave me solid recipes to make without changing a thing, until I was ready to change something. And it helped me explore unique herbs, spices, and other ingredients with the knowledge the base beer recipe was good.

So, if you’re a foodie, and you love brewing beer, you owe it to yourself to pick up a copy of Brewing Classic Styles(affiliate link). It’s considered a classic now, but that just means they nailed it.

Brew up an adventure!