Misadventures in Yeast Washing

Jars of Yeast
The jar on the left was properly washed, leaving the trub behind. The three on the right have a layer of trub below the layer of clean yeast.

If you’ve been homebrewing for a while, or even if you’re just starting, you’ve probably heard reusing your yeast can be a good thing. In most cases, the yeast is not in ideal condition when you buy it at the homebrew shop.

Depending on where you are, your yeast packet or vial may have been shipped from the opposite coast, half-way across the country or from another continent. It take three or four uses for the yeast to really hit its stride.

I’m still learning the best techniques for yeast washing, but on a recent bottling day, I learned an important lesson: when you’re tired, you’ll probably mess something up. As you can see from the photo, I was not careful to leave all the trub in the settling vessel.

It was late, I was tired and I just wanted to go to bed. I poured the slurry and let it settle, then poured it into the final jars. I made sure to leave an inch or two of sludge in the middle step, but there was so much trub in the jar I will have to wash the yeast again before I can use it. As you can see, the next day, I properly washed the yeast from the biere de garde I brewed and the jar contains only nice, clean yeast.

Anyone else miss an important step in your process? Ever have something like this happen, which you know you should have caught but missed it and were completely shocked the next day? Tell me your story.

Keep trying to make super beer! That’s what the hobby is about.

Patience can be a Virtue

Brewing beer is an exercise in patience. I’ve heard urban legends of homebrewers on top of their game who had a beer ready to drink in a week. Seven days from brew day to force-carbonation and enjoyment. I can’t help but wonder if they are just legend or if beer can actually be turned around that quickly(I know they can). I know it is not possible when you bottle-condition your beer, as I do.

Liquid Black Yummy-nessI brewed a batch of porter on Memorial Day, 2012. I bottled it two weeks later, and made the mistake of trying it one week after that.  I don’t know if it was the roasted malts or the yeast, but the beer literally tasted like sucking on a penny. If you haven’t tried it, make sure you don’t suck on a nice, shiny one, get one of the old, brown, funky-looking pennies. The flavor is quite strong, metallic and makes my mouth pucker up something fierce.

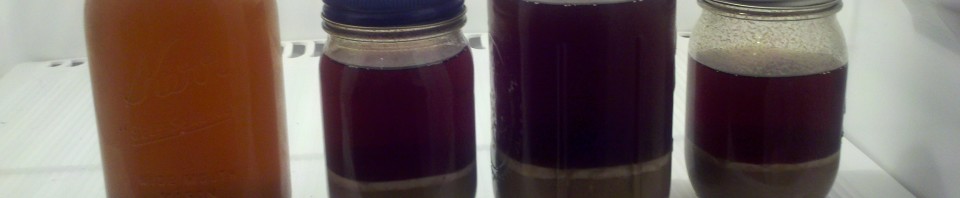
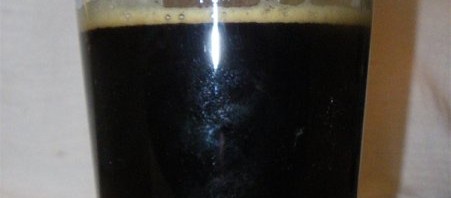
Of course, I started freaking out. It did not taste like beer. Much less, this did not taste like anything I wanted to drink. This was a deep, dark abyss of disappointment. It looked so promising on the pour; the head was small which is appropriate for a porter, the color was black as midnight, but flavor was so off I couldn’t even finish my glass of beer.

I started doing research for the cause of the off flavor: infection by bacteria, over-milling grain, sparge water too hot, etc, etc. There were so many possibilities available, my head was spinning. Most of the possibilities were eliminated due to knowing my process, but the one that wouldn’t go away was the possibility of infection. I was distraught.

The actual cause of the off flavor can be attributed to something I did not find online: impatience. With pale ales and the like, you can get away with drinking them the week after they are bottled, they just may lack carbonation. Not a big deal. Apparently, at least with this batch, dark beers do not fare as well.

I talked to members of my homebrew club and the owner of a local homebrew shop, but no one had a solution or advice. Starting to think I was going to have to uncap and dump the whole ten gallons, I tentatively sampled the beer after another week. The off-flavor was less, but still strong. At least I could finish this bottle.

I was so upset, it took me nearly two additional weeks before I worked up the fortitude to try another bottle. There was no off flavor. It actually tasted pretty good. There was rich, toasted malt sweetness with a noticeable bitterness. It came off much more like a stout than what I think of as a porter, but I enjoyed it.

Of all the beers I’ve made so far, this is the recipe several people have told me is the best I’ve made so far. And to think I almost dumped all ten-plus gallons of it after one week in the bottle. Patience saved a lot of enjoyment.

Do you have a  brewing story where a little patience was a good thing? It doesn’t have to be with carbonation, maybe it was waiting a few extra seconds before writing off your sparge as stuck or something similar.

Share your stories in the comments below.


Make a Yeast Starter . . . You Drink

The Motivation

One of the challenges of making large batches of beer is making sure you have enough yeast to get a healthy fermentation going. According to the yeast pitching rate on MrMalty, I will require 4-8 yeast packs to make sure I have enough yeast for a ten gallon batch. Why not make a yeast starter you can drink?

A nice rolling boil going.I decided I want to make a large batch of California Common, so I knew I wouldn’t be able to just pitch the vial of WLP810 into ten gallons of wort. Mr Malty said I would need a 7-liter starter, which is just under two gallons. So I decided to make a small batch of beer to use as the starter. This way, at least the starter can be enjoyed rather than just decanted down the drain.

Looking at my pile of ingredients, I figured I could shoot for a 3.5-gallon batch of a low-gravity beer using the brew-in-a-bag technique. This recipe did not come from a book or web site, so I have no idea how it will turn out. I just had some ingredients I wanted to use.

Grist

  • 6 pounds Vienna malt
  • 1 pound Munich malt
  • 8 ounces Special B

Hops

  • 1 ounce Glacier, 5.4% AA  at 60 minutes
  • 1 ounce Glacier, 5.4% AA  at 10 minutes

I heated 4.2 gallons of water to 162 degrees Fahrenheit, then added my grain into the bag and stirred to break up any clumps and get a nice even consistency. The temperature dropped to 154 degrees. I put the lid on my kettle and let it sit for fifty minutes.

After about 40 minutes, I drew up 1.8 gallons of water and heated it to 180 degrees for mash out. At 50 minutes, I took the grain bag out of the kettle. The temperature had dropped to 151 degrees.

Placing the grain into the 1.8 gallons of water and stirring it up again, I let it sit while I got the burner going under the main water. After about 5 minutes, I lifted the grain out of the smaller pot, let it drain and added the wort into the main kettle.

3.5 gallon starterI boiled and chilled normally, racked into a five gallon carboy, pitched the yeast and shook it up. Then I placed the carboy on the floor in my basement so the temperature would stay slightly cooler than the air temperature of my basement.

I understand the purpose of a yeast starter is to get a strong colony of yeast ready to ferment your beer, but why not let it server more than one purpose? If you have the time to make a batch of beer for your starter, you can get a little beer and some healthy yeast. Sounds like a good deal to me.