Unexpected Results

Pint Jar Containing Sanitized ExtractSometimes, you just want things to move more smoothly. On bottling day, I wish there was something I could do to make the process more efficient.

Brewing 12 gallons at a time, and bottle-conditioning, the day I fill bottles is the day that never passes as efficiently as I wish. Based on that frustration, I decided to create pints of priming solution.

I placed 1 and 1/4 cup of dry malt extract(DME) in each pint jar, since that is what I use for priming 5 gallons. I progressed to add enough water to fill the pint jar, shook until it was as dissolved as possible. Then I added water to fill up to a full pint.

After mixing, I placed the pints into my pressure cooker and processed at 15 pounds for 30 minutes.

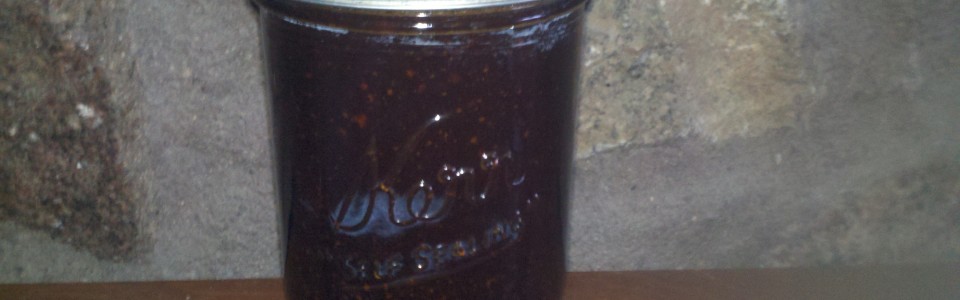
There were several differences in creating the solution that caused some problems, and now I have four pints of over-dark priming solution with chunks in it.

My normal procedure is to dissolve 1 and 1/4 cup DME in two cups of water. Looking back, I realize there was probably one cup of water in this solution. The resulting solution is the consistency of maple syrup, not quite the thickness of liquid malt extract. I had concerns before the processing in the pressure cooker, but thought it would be OK.

The increased temperature from the extra 15 pounds of pressure, increased the darkening reactions to the point where it appears to be stout colored. Dilution will lighten the color, but the clumps of DME prevent me from using it for bottling. Bottle-to-bottle variation would just be too great.

I will probably use these to add gravity during fermentation in stages. Hopefully these extracts will be good for staged additions.

Have you had experiences that don’t turn out as expected? Please comment below and let me know whether you were able to put the surprise(s) to use.

Christmas Gift Ideas for Your Favorite Homebrewer!

Don't leave your Christmas tree lonely!Buying a gift for a homebrewer can be a great way to get on their list of people who get to help drink their beer. Although, to be honest, most homebrewers I know are so excited about what they’re making they’ll share it with anyone who shows interest.

This is a list of gear that I think any homebrewer would love to see under the tree! Hopefully you know your homebrewer well enough to know whether he needs these items or not. Some can be useful, even if it’s a duplicate.

If there’s a homebrewer in your life, you can bet they will appreciate the gift of equipment to help them brew more or better beer.

I’ve tried to break up the categories of gifts in ways that make sense, but what makes sense to me doesn’t always make sense to others. I hope this list is still useful. Have a Merry Christmas!

Brewing Gear

A Brewing Spoon

SS Brew Spoon21″ Stainless Steel Spoon – You never really think about the value of a good, durable spoon. Many homebrewers will start out using the cooking spoons in their kitchen, and that works for a while. But many of the handles are too short. I nearly burned my fingers stirring a brewpot with a normal kitchen spoon.

When I started all-grain brewing, I purchased a long-handled plastic brewing spoon, but didn’t really understand how much the brewing process would chew up the plastic. This stainless steel spoon with a long handle will let your homebrewer stir everything from a thick mash to a huge boil kettle without endangering their fingers or their spoon.

A Bigger Kettle

A bigger kettle is one of the first steps many homebrewers make when they decide they’re going to keep making beer after the first few batches. You can brew extract batches with a small kettle, but it affects the color and flavor of your beers. Doing a full-wort boil improves the hop flavor and aroma in your beer and allows for better consistency.

An 8 gallon or 9 gallon brew pot will allow you to brew a five-gallon batch of beer, leaving enough headspace to reduce the chances of a boilover. The 9-gallon option would also give a brewer space to step into all-grain brewing with the “Brew in a Bag” technique. These larger kettles can also be useful for holding wort or heating water if the brewer steps up to brewing ten-gallon batches.

The Ultimate Option would give your brewer the flexibility step up to batches in the 10-15 gallon range. This would allow them to produce twice as much beer in approximately the same amount of time as a 5-gallon batch.

 A Refractometer

A refractometer is an instrument used to measure the specific gravity of liquids. Brewers can use a refractometer to take multiple measurements throughout the course of brewing. Unlike using a hydrometer, you only need a few drops of wort  to take a reading, which means even hot wort will cool quickly enough to use the reading to adjust your recipe on the fly.

Beer Kit of the Month

Subscribing to a beer kit of the month program is a great way to keep your brewer brewing. Also, these programs generally send a variety of beers to introduce new flavors and styles in a way that can keep the brewer trying new things.

What they need

Most of the homebrewers I know have a list of items they would like to have for brewing. Ask the homebrewer in your life if there are any items they need, and they will make sure you have lots of options.

Have a Merry Christmas!

This article contains affiliate links. If you use these links, I will receive a small commission. Please shop with your local homebrew supplier.